
Sharpening a Veneer Saw
You will need to bevel the saw blade with a fine oil or water stone. The bevel must be made on the same side of the saw as the handle because you'll need a perfectly flat surface to ride against your straight edge. This will provide you with a cut that is square on one side and beveled on the other. The side that is square is the side that is taped when making a joint between two pieces of veneer.
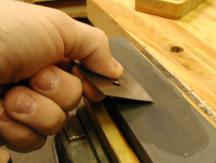 Hold the blade between your thumb and the inside edge of your index finger at approximately 15 degrees. Stroke the blade across the stone several times and then check your progress. You'll need a gentle sweeping-arch motion to bevel each tooth on the saw.
Take your time with this process and be cautious that you do not over-sharpen the points. They should feel prickly when you are done. If you over-sharpen the points, they will feel (and look) flat and the saw won't cut veneer correctly.
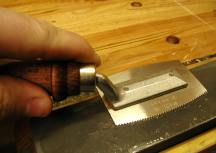 After beveling the saw, you need to hone the back side of the face with a water or oil stone. A few seconds of light honing will make a measurable difference in the quality of the cut.
This edge should now be ultra-sharp and ready to crosscut and rip any veneer like a laser.