Our “Miazda”
2008 PHRT MX-5 Touring
UPDATE: THIS CAR IS NOW FOR SALE. CLICK HERE FOR DETAILS.
When my wife and I test drove a MX-5 GT several months ago, I wasn’t very thrilled with the audio system despite the dealer touting the Bose name on the head unit. I figured that a Touring model would be a better choice for us and since I knew the audio system was going to have to be replaced sooner or later and the heated leather seats would be of little interest.
So we purchased a Touring model with PRHT without giving much thought to the audio side of the car. On the ride home, I knew “sooner or later” would be much sooner. The sound in the Touring version of the car was absolutely pitiful. There was too much midrange and almost no bass. My favorite CD’s sounded so bad, I couldn’t stand to listen to them at even low volume levels.
My opinion has always been that most factory head units can process good quality sound but they are rarely paired with good speakers and adequate power. My thoughts on this proved to be right (in my opinion) with the Touring MX-5. Here’s what I did and why.

Decisions, Decisions
The factory head unit in the Touring has two features that I really like. The first is the steering wheel control. I love this feature and I didn’t want to lose it. I know there are adapters for most steering wheels to allow continued use with non-factory head units but these units are plagued with a “delay” problem that I knew would annoy the bejesus out of me everyday. The other feature I’ve grown to appreciate is the auto sound level control (ASL) which lowers the volume of the stereo when the car slows down or comes to a stop. I didn’t want to lose this feature either.
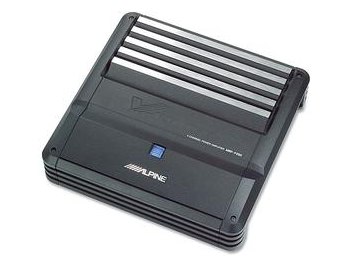
So I opted to keep the factory head unit and power new speakers from an Alpine F250 which accepts speaker-level inputs from the head unit (no line level converter needed). This is an affordable amp with a good reputation that powers the speakers perfectly. I figured that I had two options for using the four channels of this amp.
- Power the fronts on channels 1 and 2. Power the rears on channels 3 and 4.
- Power the fronts on channels 1 and 2. Power the rears from the head unit and save channels 3 and 4 to be bridged for a future subwoofer upgrade.
I went with the first option figuring that if I ever wanted add a sub, I could rewire the rears to power off the head unit very easily from the trunk (where my amp is located).
I’m a big fan of Polk car audio and bookshelf speakers. Their larger home theater speakers are nice too but I prefer Boston Acoustics for that kind of use. The car audio Polks have a nice array of sound without being too tinny or boomy. They sit just in the middle with crisp highs and punchy lows. For this installation, I chose their DB6501 component speakers for the fronts and DB351’s for the rear fill. I bought these sound-unheard (like sight-unseen) knowing that my previous history with Polk’s has always been good. I have owned Diamond Audio speakers and MB Quarts in the past. The Diamonds did not impress. The MB’s were too expensive for what they offered in terms of sound quality.
|
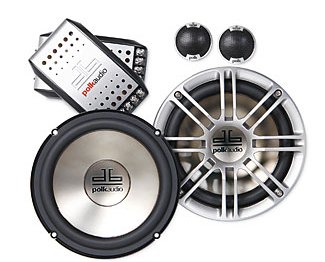 Polk DB6501 |
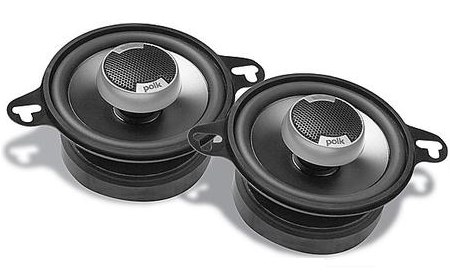 Polk DB351 |
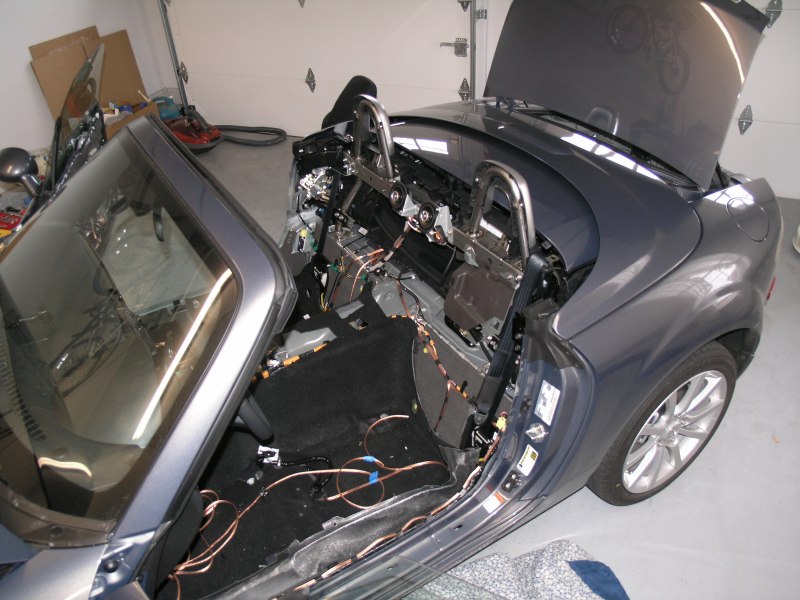
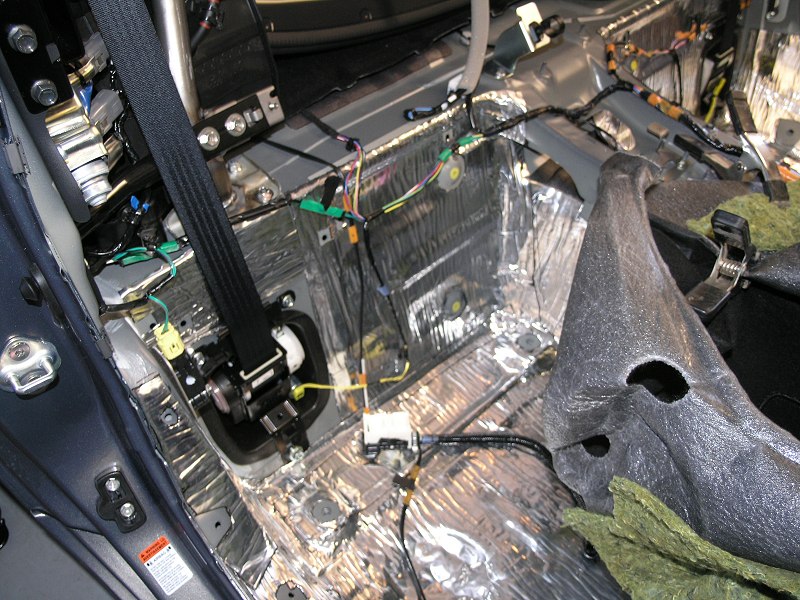
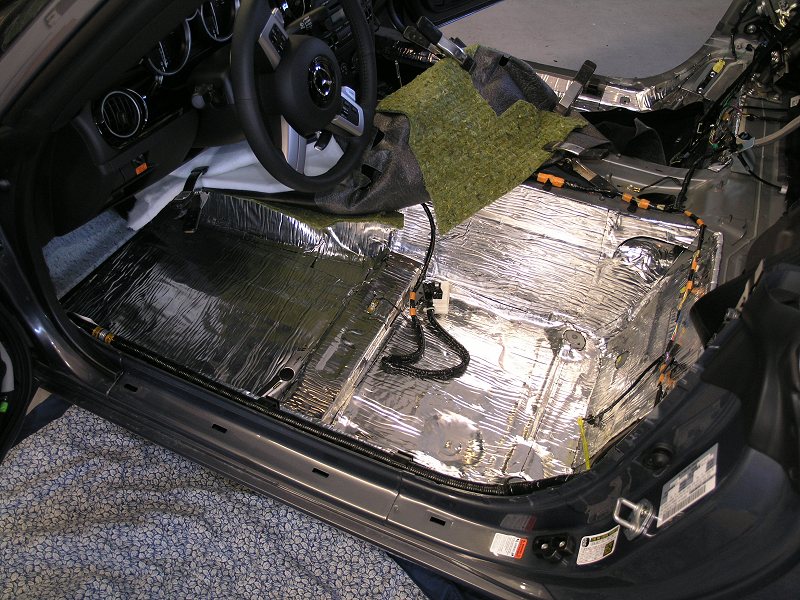
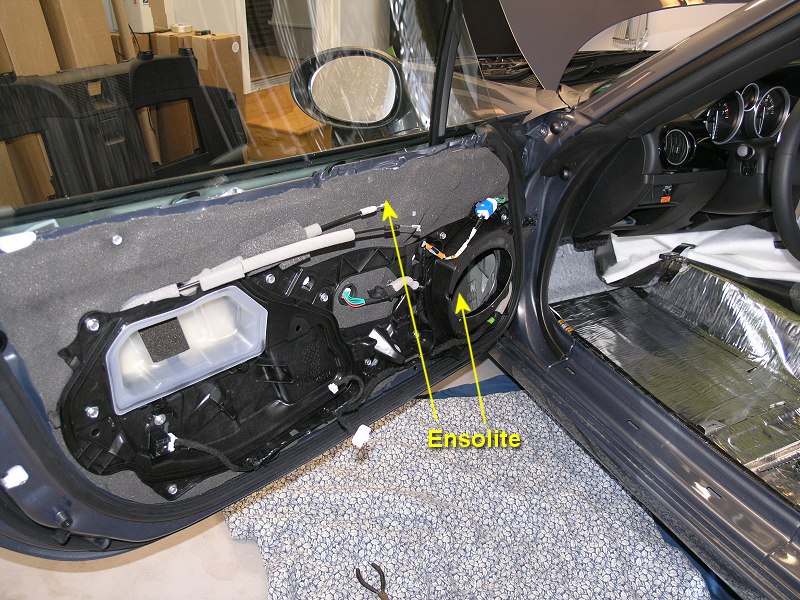
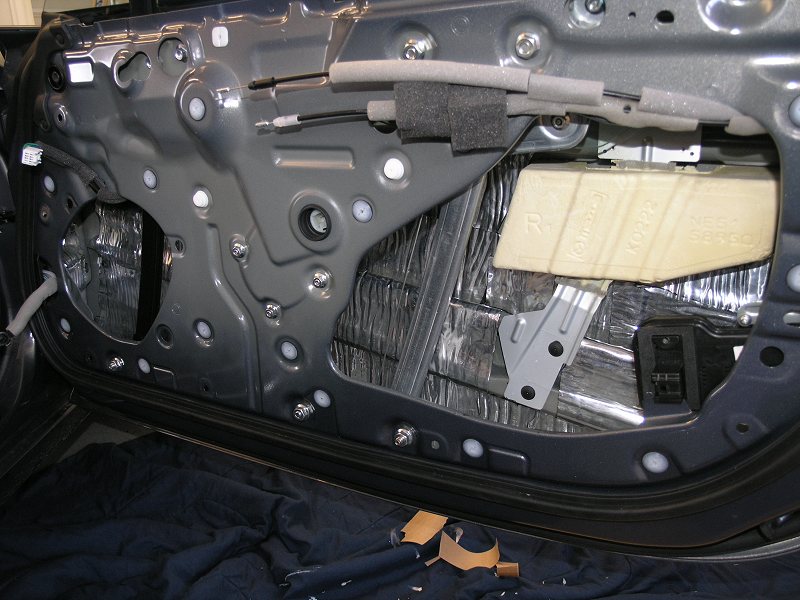
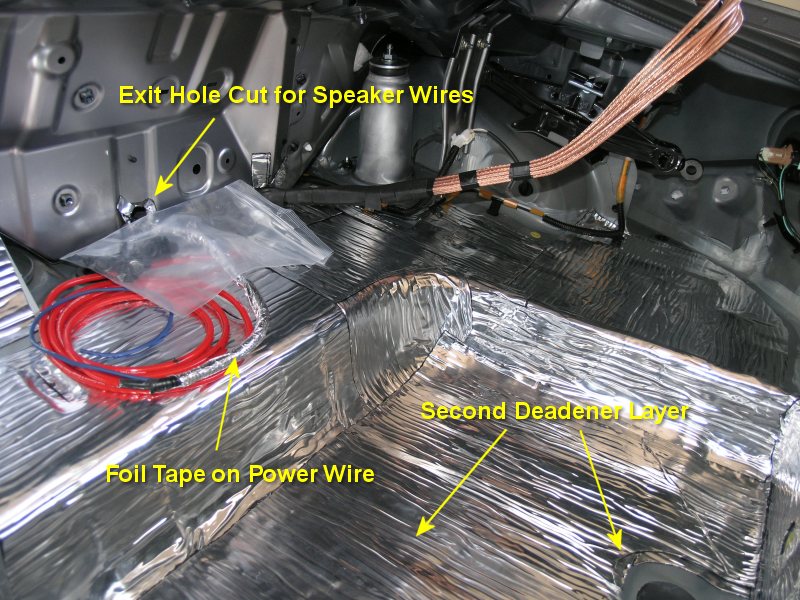
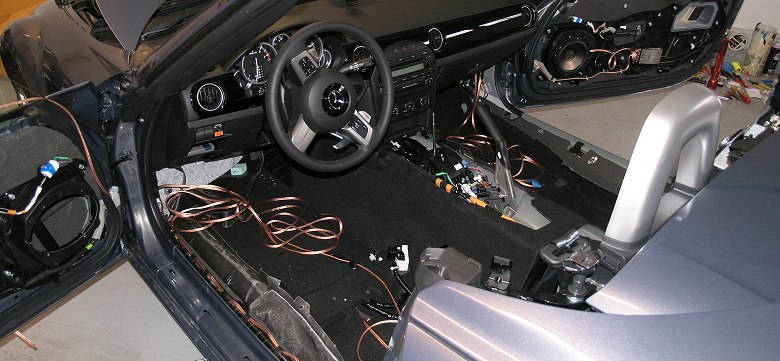
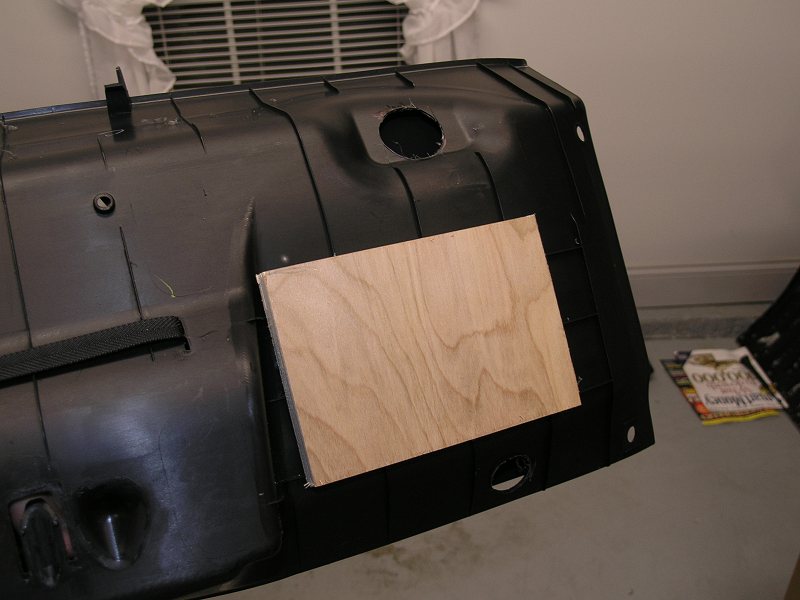
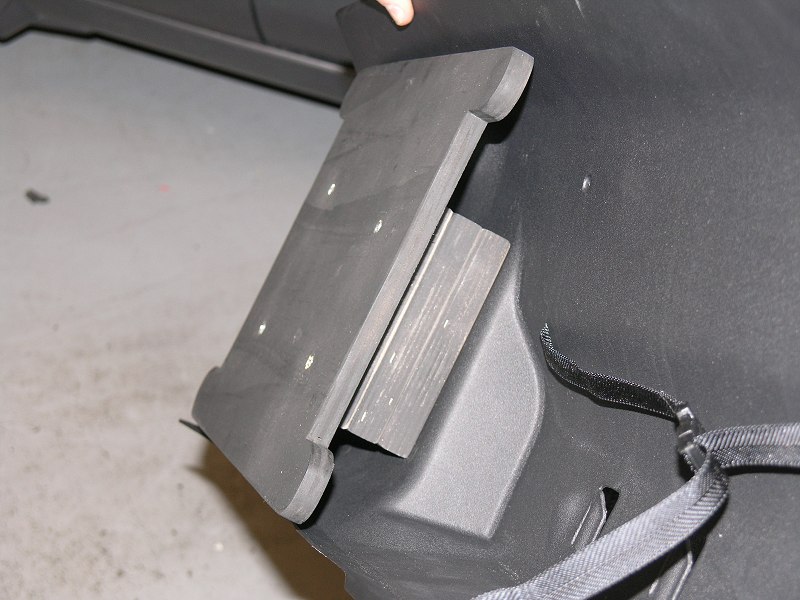
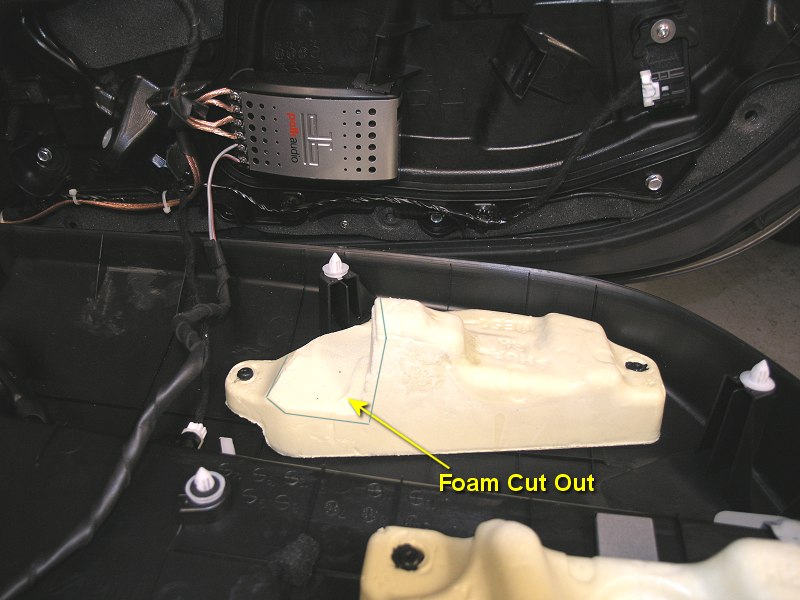
Knowing I would be removing most of the car's interior to run a lot of wire to the trunk, I decided to use this opportunity to install a significant amount of sound deadening material throughout the cockpit and trunk. I opted for RAAMmat BXT and its companion, Ensolite.
I’ve never been too impressed by the effects of adding sound deadening but I suspect that is largely because I never used enough of it or I used it in cars that didn’t really need it to begin with. But using such a substantial amount of deadening in such a little car has indeed made a noticeable difference. How noticeable? Let me describe it like this...
- Previously, my wife and I found it necessary to raise our voices (even with the radio off) to maintain a conversation on certain road types. With the sound deadening, we can maintain conversation at lower-than-normal volume levels regardless of the road surface.
- The stereo can now be heard at a low volume while driving. This is nice because it means we can have the stereo on and speak to each other without having to lower the volume when one of us has something to say. In other words, we can leave the radio low enough that we can hear it but we can still talk to each other without having to raise our voices.
- The doors open and close with the sound of a high-end Lexus. It’s quite a satisfying sound.
- With the PRHT up, the exhaust note is somewhat attenuated but you still hear it when you lay into the pedal. Without the auditory demand for attention from the exhaust, I now hear more engine sound which is pretty cool and is no doubt part of the experience of driving this car.


