|

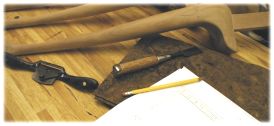
A perfect seam line begins with a perfect cut and a sharp veneer saw is the best way to get there. This article explains the simple task of sharpening a standard veneer saw.
There are some veneer books that recommend filing off the tips of the saw and then forming new teetFnh with a file. I can't imagine why an author would put such useless and misleading information in a book. Do not file off the teeth! That would be "pointless". Get it?
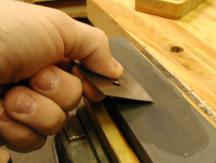
My sharpening process is simply a beveling of the teeth on the saw blade with a fine sharpening stone. The bevel is made on the top side of saw blade. This will provide you with a cut that is square on one side and beveled on the other. It is the square sides of the veneer that are taped together when joining two pieces.
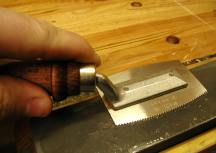
Hold the blade between your thumb and the inside edge of your index finger at approximately 15 degrees. Use both hands to hold the blade if necessary. Swipe the blade across the stone several times. Make contact between the stone and each tooth on the blade.
When I do this doubled-handed, I keep my upper body stiff and then rotate at my hips to create a back and forth motion across the stone. Along with somewhat-firm downward pressure, this sweeping/arch motion is all that is needed to bevel each tooth.
Check your progress on the blade after every ten to twelve swipes to see if metal is being removed from all of the teeth. If not, adjust the arch of the sweeping process so that each tooth has metal removed with each pass. You'll get the feel for it fairly quickly.
|
|
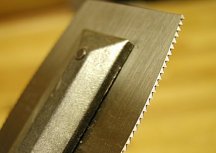
Take your time with this process and be cautious that you do not file off the tips of the teeth. They should feel very prickly when you are done. If you over-sharpen the points, they will look and feel flat, and the saw won't cut a veneer very well.
 After beveling the saw teeth, you may need to hone the back side of the blade with the sharpening stone if the back of the teeth do not feel smooth. You'll find that a few seconds of light honing will remove the burr. This process is not done to make the back of the saw blade perfectly flat (that often can not be done with these types of saws). The goal is simply to remove any burrs, but keep in mind that a fine grit sharpening stone may not leave any burrs to begin with. After beveling the saw teeth, you may need to hone the back side of the blade with the sharpening stone if the back of the teeth do not feel smooth. You'll find that a few seconds of light honing will remove the burr. This process is not done to make the back of the saw blade perfectly flat (that often can not be done with these types of saws). The goal is simply to remove any burrs, but keep in mind that a fine grit sharpening stone may not leave any burrs to begin with.
The edge should now be ultra-sharp and ready to crosscut and rip any veneer like a laser.
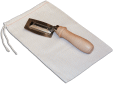
Dual Edge Veneer Saw at VeneerSupplies.com
With 18 fine, unset teeth per inch, this saw cuts with precision
accuracy. Though I am a "lefty" and these saws are designed
for right handed people, I've had no trouble using the saw in my
right hand. I use my left hand to hold the straightedge down and
my right hand to saw. As long as the saw is sharp, you won't
need to apply much pressure to cut the veneers cleanly. |
|
|

This veneer saw uses the "ramps" grind which is a much
improved design over the traditional "mountain grind".
These superb
veneer saws are available hand-sharpened on both sides of the blade
for a thin, true and laser-like cut. You
will cut exceptional seams with this saw and the right cutting technique.
|